SANDCASTLE BUILDING CONTEST, PART II - GEAR
One of the best (*) ways to learn photography is to pick a project and figure out what you need, rather than learning a random assortment of skills, settings, and techniques and then figuring out how to put that all together. Top-down learning vs bottom-up.
Picking a project is also a great way to justify getting new gear. *grin*
In this case, Leap's 30th Annual Sandcastle Contest is that project.
GOALS
In Part I, I jumped at the opportunity to be a volunteer photographer for the contest and came up with a list of seven steps I felt were important when tackling this project:
- Confirm photography skill level they expect and commit to event.
- Look at photographs of previous events
- Seek advice on gear and techniques to use to elevate my performance
- Buy and rent gear as needed
- Become familiar with that gear and scout out the scene before the event
- Shoot, post-process, and submit my work
- Review, learn, and grow as a photographer
I sought advice from the Tested.com Cameras sub-forum and went about getting the gear I thought I'd need. (There are much more active photography forums, but it's a place I'm comfortable with, and I like the forum culture they have over there.)
I went in thinking I would need two or three things:
- Monopod
- Circular Polarizer
- A New Lens
- New Bag (Maybe)
What I ended up getting (so far) is:
- Travel Tripod
- Circular Polarizer x2, Step Up/Down Rings, & Diffuser
- Flash & Remote Trigger (Rental), Batteries
- Bag Add-on Pouches
And this is of course adding to my Camera (Canon 70D), Strap (Black Rapid Sport), Backpack (Clikelite Probody Sport), and other miscellaneous necessities like cleaning gear.
So let's take a look at what I've picked up one by one.
TRAVEL TRIPOD - MANFROTTO BEFREE
After checking out the photo archive from previous years, one thing stood out. The sandcastles are huge and standing height camera angles don't do them justice.
Nice. I have something specific I can strive to improve upon.
These sandcastles are being built by teams that represent each school, and while I'm going to want to take some low, side shots of each castle if appropriate, I know I'm going to want to take some shots where you can see the whole thing.
In my head that meant I needed a monopod to raise my camera up at least a few more feet above my head. Getting an aerial drone would be nice, but that was out of the question. But then in the Tested forums, user TsunamiJuan suggested I pick up this lightweight travel tripod instead.
In my 5 Points of Photo Paralysis post, Product Paralysis was one of the key things keeping me from getting out there and actually doing photography rather than just abstract learning of photography. There are too many factors when choosing a tripod, and so many warnings about not getting a cheap one, that while I knew a tripod was one of the essential pieces of gear I was missing I was too afraid to commit to getting any specific one.
But as soon as I was told about the Befree, it made so much sense. I never considered just using a tripod as a monopod. This thing is so small and so light, that it will perform what I wanted, while at the same time getting me to check "Tripod" of essential gear to get off my list. It's brand new, by a company that people trust, I don't have to stress about choosing a ballhead because it comes with one attached, and it also comes with the Manfrotto RC2 plate that's compatible with my Blackrapid strap. If there is ever a time that I need a heavier, sturdier, and taller tripod for whatever reason, it will be so completely opposite to the BeFree that I won't have to feel like I wasted my money since each will have their own use cases.
(*) Okay, I fibbed. I think the best way is to mix it up with both. Bottom-up learning can be tedious and boring, and you can lose your fire if you stick only to that. On the other hand, it's it is important to learn that basic knowledge so you don't get overwhelmed. Like hitting a random box in Minesweeper, it'll help give you a starting point. And either method is great to sparking inspiration for trying something new.
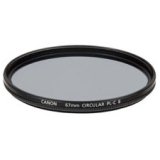
CIRCULAR POLARIZER (AND MORE) - CANON 67mm CL-P B
I learned a lot from my outing at Baker Beach, including seeing first hand how hard it can be to get color in both the sky and everything else in just one photograph. Wanting to get that color is what led me to testing out Lightroom (and being thoroughly impressed with even the most basic functions) and what led me to learn about the concept of HDR.
It was a good learning experience, but if there are steps that I can take to reduce post-processing time, I want to take it. And from what I understood when strategizing what gear to get, a circular polarizer does exactly that.
I ended up buying a cheap $30 Tiffen polarizer for my 40mm f/2.8 lens before getting the advice about picking up a lens for the largest lens I own (or plan on owning), and then using Step Down rings to attach it to any other lenses I own. I didn't even know Step Down rings existed.
Things I learned due to this advice:
- Typing in "Circular Polarizer" on Amazon will only show you the third party brands because Canon doesn't use either of those words in the product title. (I was trying to follow the advice of not going cheap, but couldn't find it and ended up with the Tiffen.)
- Step Up rings are different than Step Down rings. Step Up rings are the ones you want.
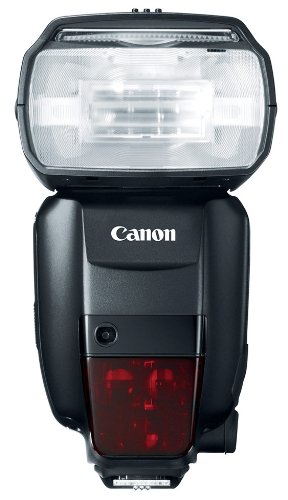
FLASH & TRIGGER - 600EX-RT & ST-E3-RT
This event was a great time to try out renting something. I was originally thinking about renting the Canon 50mm f/1.4 lens, but my 40mm f/2.8 can fill pretty much the same role. What I don't have is another piece of essential gear... a flash.
After learning how the 600EX-RT uses a new radio trggering (RT) system, as opposed to the old method which spawned the creation of third party devices like Pocket Wizards and Radio Poppers, there was no doubt in my mind that choosing a cheaper, older model was out of the question.
I've also been eagerly awaiting the coming of the holiday season and the sales that come with it because these flashes aren't cheap. With that in mind, this was the perfect time to try out the renting process of Borrowlenses.com.
I'm not absolutely sure how I'm going to get the best results out of using this flash since I expect to be on the move a lot through what I hope is a lively and decently crowded event. I also know that I'm not going to have control over the time of day I'm going to be shooting at, nor will have control of the direction of the light if I want to get specific angles on specific sandcastles, so it's best to be prepared. (After my beach scouting excursion, I also picked up a cheap diffuser, just in case.)
What I learned from this is that to use the flash off camera, I needed to also pick up the Speedlite Transmitter (or a second 600EX-RT). If I'm going to play around with the flash, I want to get the most out of this learning experience.
While I knew that Borrowlenses didn't supply batteries with the rental, what I didn't realize is that I'd need to read the manual to figure out how to use these things, so they ended up staying in the car while I was at my beach scouting session. I'll probably drop by the beach a second time the day before the event to test them out one more time.
BAG ADD-ON POUCHES - CLIKELITE POUCH (MEDIUM & SMALL)
While I love the camera backpack I've bought, I've been trying to find a reason to pick up a messenger bag. Specifically I've been looking at the Tenba messenger bags. The only problem is that the more I stare at the product, the more I want to go for the version that comes with a custom logo engraved plate, and that won't be ready in time.
Conveniently I received an email from Clikelite about discounts and savings, and so I picked up both the small and mediium accessory pouches on sale with free shipping. I don't have any particular use for them at the moment, but buying these did serve to satiate my desire to get a new bag, while giving me options to think about when trying to figure how to carry and access everything I need on the day of.
TOTAL COST - $625.00+
That's it for the new gear I got in preparation for the event. In Part III I'll go into actually scouting out area and share some pics.


